Installation Tips for 3D Office Signs: Step-by-Step Guide for a Professional Fit
Installing 3D office signs correctly is crucial for ensuring both a professional appearance and secure, long-lasting placement. Whether you’re mounting a logo in your reception area or directional signage in your office corridors, proper installation methods will make all the difference in how your sign looks and performs over time. From adhesive-backed mounts to stand-offs and stud screws, there are several ways to install 3D signs based on the material and the surface you’re working with.
This guide will walk you through the various installation techniques, ensuring that your 3D office signs are installed securely and aligned properly, whether you choose to do it yourself or opt for professional installation services.
Learn more about installation services here.
Why Proper Installation is Key
Before diving into the step-by-step process, it’s essential to understand why proper installation is important:
- Professional Appearance: A well-installed sign looks polished and aligned, ensuring that your brand or message comes across as professional and trustworthy.
- Longevity: Signs that are installed securely can withstand the test of time and wear and tear, ensuring they remain in place for years to come.
- Safety: Proper mounting ensures that heavy or large signs are safely secured to the wall or surface, preventing accidents or damage.

How to Install Different Types of 3D Office Signs
There are several methods to install 3D office signs, depending on the material of the sign, its weight, and the surface it will be mounted on. These include adhesive-backed mounting, stud screws, stand-offs, and snap studs. Here’s a closer look at the options:
1. Adhesive-Backed Mounting
Adhesive-backed mounting is a simple and clean installation option often used for lightweight signs like acrylic or PVC. This method doesn’t require drilling or screws and is ideal for indoor use where the surface is smooth and free from texture.
- Best For: Lightweight materials like PVC or small acrylic letters.
- How It Works: The back of the sign comes with an adhesive layer that is pressed against the mounting surface. Once positioned, the adhesive forms a strong bond with the surface.
- Surface: This method is perfect for smooth surfaces like glass, painted drywall, or metal.
Tip: Make sure the surface is clean and dry before applying the adhesive to ensure a firm bond.
Learn more about installing PVC signs here.
 2. Stud Screws for Secure Mounting
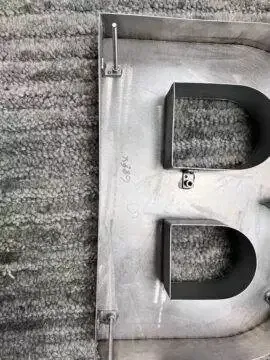 2. Stud Screws for Secure Mounting
For heavier signs made from materials like metal or wood, stud screws are often the best option. This method involves drilling holes into the surface and securing the sign with screws, ensuring that it’s held firmly in place.
- Best For: Heavier signs made of metal, wood, or thicker acrylic.
- How It Works: Studs are attached to the back of the sign, and corresponding holes are drilled into the wall or mounting surface. The studs are then aligned and inserted into the holes, securing the sign in place.
- Surface: Stud screws work well on walls made of drywall, concrete, or brick where extra security is needed.
Tip: Ensure that the studs are correctly aligned with the drilled holes to avoid misplacement.
Learn more about metal sign installation tips here.
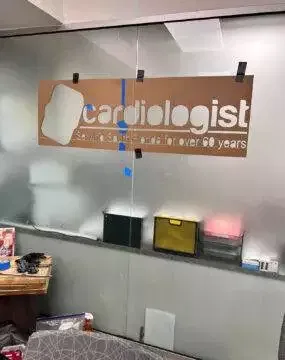
3. Stand-Offs for Dimensional Effects
Stand-offs are used to create a floating effect, adding depth and dimension to your 3D sign. This method uses spacers to mount the sign away from the wall, creating a professional, three-dimensional appearance that makes the sign stand out.
- Best For: Signs made of acrylic, metal, or HDU, especially when you want a floating effect.
- How It Works: The stand-offs are mounted to the wall, and the sign is then attached to the stand-offs with screws. This creates space between the sign and the surface, allowing for depth.
- Surface: Works best on smooth, strong surfaces like drywall or concrete where the stand-offs can be securely fastened.
Tip: Use a level to ensure that the stand-offs are aligned and the sign is installed evenly.
Get more design ideas for HDU signs here.
 4. Snap Studs (Two-Part Spacers)
Snap studs are a type of two-part spacer system that attaches to the back of the sign and the mounting surface. This allows for easy installation and removal, making snap studs a convenient option for modular signage.
- Best For: Acrylic, PVC, or lightweight metal signs that may need to be changed or repositioned periodically.
- How It Works: One part of the snap stud is installed on the wall, while the other is attached to the back of the sign. The two parts snap together, holding the sign securely in place.
- Surface: Snap studs work well on drywall, glass, or metal surfaces.
Tip: This method is great for office environments where signage may need to be updated or rotated frequently.
Learn more about design and material options for 3D signs.
Step-by-Step Guide to Installing 3D Office Signs
No matter the installation method, a few basic steps will ensure that your sign is mounted correctly and securely. Here’s a general guide to help you through the process:
Step 1: Gather Your Tools
Before you begin, make sure you have the necessary tools and materials for installation. These may include:
- Tape Measure: To ensure precise alignment and placement.
- Level: To check that the sign is straight and even.
- Drill and Screws: For stud screw and stand-off installations.
- Adhesive: For adhesive-backed mounting.
- Mounting Template: Your sign should come with a mounting template to help with alignment and positioning.
Step 2: Prepare the Surface
Clean the surface where the sign will be installed. Dirt, dust, or moisture can weaken adhesive bonds or interfere with the installation.
- For adhesive-backed signs, ensure the surface is smooth and dry.
- For stud screws or stand-offs, check that the wall is strong enough to support the weight of the sign.
Step 3: Use a Mounting Template
Most 3D office signs come with a mounting template to ensure proper alignment. The template helps you mark where to place screws, studs, or adhesive, making the installation process much easier.
- Adhesive Signs: Use the template to mark the exact placement before applying the adhesive.
- Stud Screws/Stand-Offs: Use the template to drill pilot holes for the studs or stand-offs.
Step 4: Mount the Sign
Once the surface is prepped and marked, it’s time to mount the sign. Follow the specific steps for the method you’re using:
- Adhesive Signs: Press the sign firmly against the surface, holding it in place for a few minutes to ensure a strong bond.
- Stud Screws/Stand-Offs: Insert the screws or stand-offs into the pre-drilled holes and secure them tightly. Attach the sign to the mounting hardware.
- Snap Studs: Align the snap studs with the pre-installed wall components and snap the sign into place.
Step 5: Final Alignment Check
Once the sign is mounted, step back and check that it is straight and level. Make any adjustments as needed before securing the sign fully.
Explore more detailed installation guides here.
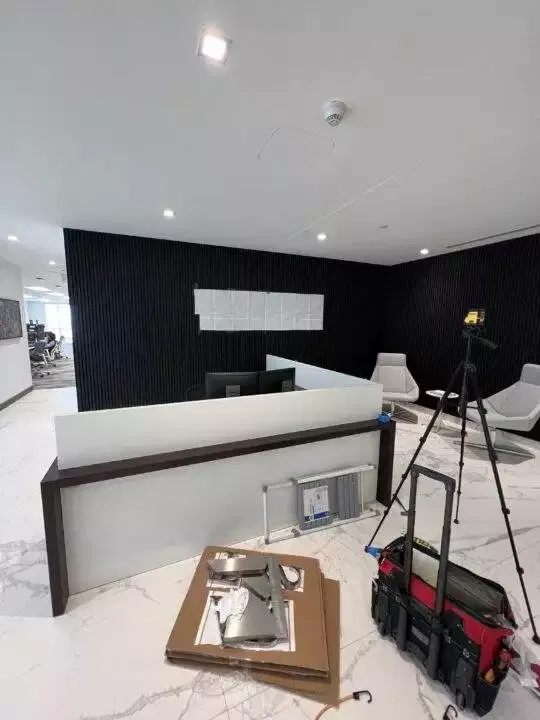
Professional Installation Services in South Florida
For businesses in South Florida, including Miami, Doral, Coral Gables, and surrounding areas, we offer professional installation services to ensure your 3D office signs are mounted securely and aligned perfectly. Our team has extensive experience installing all types of signage, from lightweight acrylic to heavy-duty metal, and can handle installations in any office environment.
Whether you’re installing signs yourself or opting for professional services, we ensure that every sign we create is easy to install and comes with detailed instructions and mounting templates.
Contact us today to learn more about our installation services!